Editing Mode - Basecoat Editing Mode
The triangle meshes of objects can be rendered using an arbitrary number of shaders composited in layers. The result is called the basecoat.
Mouse
Left-clicking the mesh will select it.
GUI
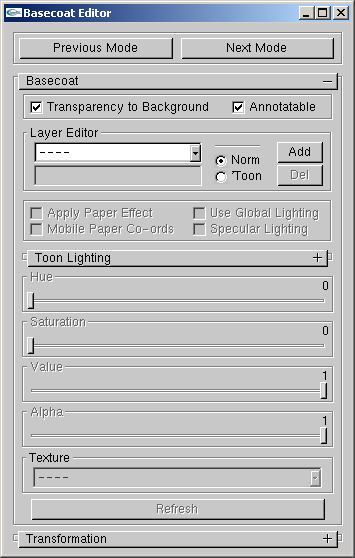
The GUI displays the basecoat configuration of the currently selected object.
Layer management
The basecoat is composed of shaders arranged in layers. The layer editor displays the current set of layers in the order in which they are composited. It also facilitates the adding and removing of shader layers.

Layer management.
- Layer Editor List Box
Selects the current active layer. A layer consists of one shader either a normal shader or a toon shader. Layers are numbered in order and layer zero is composited first. A selection "----" indicates that no layer is selected.
- Layer Editor Text Box
Text entered here is used to name the active layer.
- Norm, Toon
Selects the type of shader to be created, when a layer is added.
- Add
Adds a new layer of the currently selected type after the current active layer. To insert a layer before the zero layer, set the active layer to "----".
- Del
Deletes the current active layer.
- Transparency to Background
If checked, a special layer is composited first, before the zero layer. This shader renders the mesh triangles to look identical to the background, accounting for the current background texture, paper, etc.
- Annotatable
If unchecked, this object is not rendered into the ID image. This will cause visibility to fail on all stroke-based effects. This can be useful to achieve transparent objects which do not occlude the strokes of objects behind them.
Normal Shaders
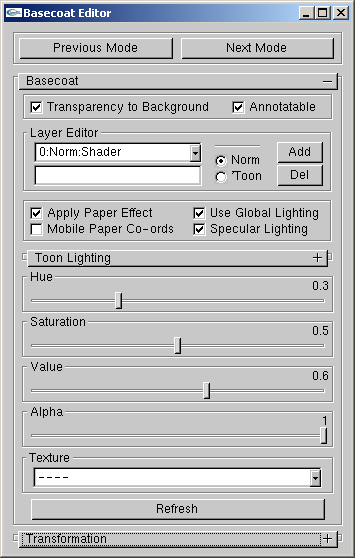
When a normal shader layer is selected, the remaining basecoat controls adapt to display the relevent settings. The normal shader consists of a solid color, optional texture map, optional alpha and optional paper shader, and can be lit by the global lighting environment.

Normal Shaders.
- Hue, Saturation, Value
Sets the solid color of the shader.
- Alpha
Sets the alpha used for compositing this layer. This is analogous to pressure w.r.t. paper effect simulation shader.
- Texture
Selects an optional texture map to modulate the triangles. This texture map could include alpha.
- Apply Paper Effect
Enable paper effect shader on this layer.
- Mobile Paper Co-ords
If unchecked, the paper shader's height field texture, for this layer, is fixed in screen space. If checked, the height field texture moves with the bounding box of the object.
- Use Global Lighting
If checked, triangles are modulated by the current diffuse lighting environment.
- Specular Lighting
Adds a white specular component to each active light.
- Refresh
Regenerates the texture list.
Toon Shaders
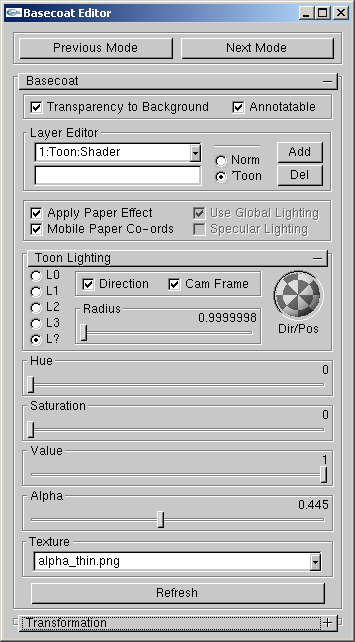
When a toon shader layer is selected, the remaining basecoat controls adapt to display the relevent settings. Toon shading is defined by a diffuse lighting calculations which looks up into a 1D texture. Here, the toon shader consists of a solid color, a 1D texture map, a lighting description, an optional alpha and an optional paper shader.

Toon Shaders.
- Hue, Saturation, Value
Sets the solid color.
- Alpha
Sets the alpha used for compositing this layer. This is analogous to pressure w.r.t. paper effect simulation shader.
- Texture
Sets the 1D lookup texture. Optionaly contains alpha.
- Apply Paper Effect
Enable paper effect shader on this layer.
- Mobile Paper Co-ords
If unchecked, the paper shader's height field texture, for this layer, is fixed in screen space. If checked, the height field texture moves with the bounding box of the object.
- L0, L1, L2, L3, L?
Switch the light to use. L0 through L3 are the global lights. L? specifies a light unique to the active layer.
- Direction
If checked, directional light, if unchecked, positional light.
- Cam Frame
If checked, light is stationary in camera frame, if unchecked, light is stationary in world frame.
- Dir/Pos
Sets direction/position of light.
- Radius
Sets the radius of light from the camera/world origin.
- Refresh
Regenerates the texture list.
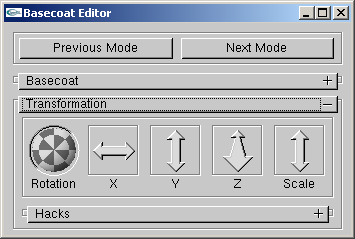
Transform
Controls for transforming objects in the scene. This is mostly a hack, these operations will be performed in Maya, Lightwave, etc.

Transform.